Tesla Model S/3/X/Y with HW3/HW4#
Tesla Model S, Model 3, Model X, and Model Y with HW3 or HW4 are officially supported by upstream openpilot. I designed both the Tesla A harness (HW3) and Tesla B harness (HW4) and contributed them to comma.ai, so these cars are fully supported out of the box.
Quick Start#
- Get a comma four (or comma 3X) — the matching Tesla harness (A for HW3, B for HW4) is available directly from comma.ai when you buy the device
- Install the harness and connect your comma device
- Install openpilot — the stock upstream version supports your car
- If you see “Car Unrecognized”, fingerprint your car
That’s it. No special fork or additional hardware needed for basic openpilot functionality.
The harnesses are also available in my shop if you prefer:
They are identical to the ones sold by comma.ai.
Supported Devices#
- comma four or comma 3X — recommended
- comma three (deprecated)
Harness Installation#
The harness installs at the autopilot computer behind the glovebox.
This video walks through the HW3 harness installation: Installation Guide (YouTube)
Note: The video shows connecting a cable to the A-pillar diagnostic connector. This is not needed for the standard harness from xnor.shop or comma.ai — it is only required if you add the Vehicle CAN Addon Cable.
Model 3/Y with HW3:
Model 3/Y with HW4:
Vehicle CAN Bus Addon#
The standard comma harness only connects to the Chassis CAN bus, which is sufficient for steering and cruise control. However, some features require access to the Vehicle CAN bus — a separate bus that carries infotainment and body data.
The Vehicle CAN Addon Cable adds two wires (blue and pink) to your existing comma harness via Molex Micro-Fit terminals. The addon cable then plugs into the diagnostic connector on the A-pillar — the same location where the popular S3XY Buttons Commander by enhauto connects.
This upgrade works with both HW3 and HW4 harnesses purchased from comma.ai or xnor.shop.
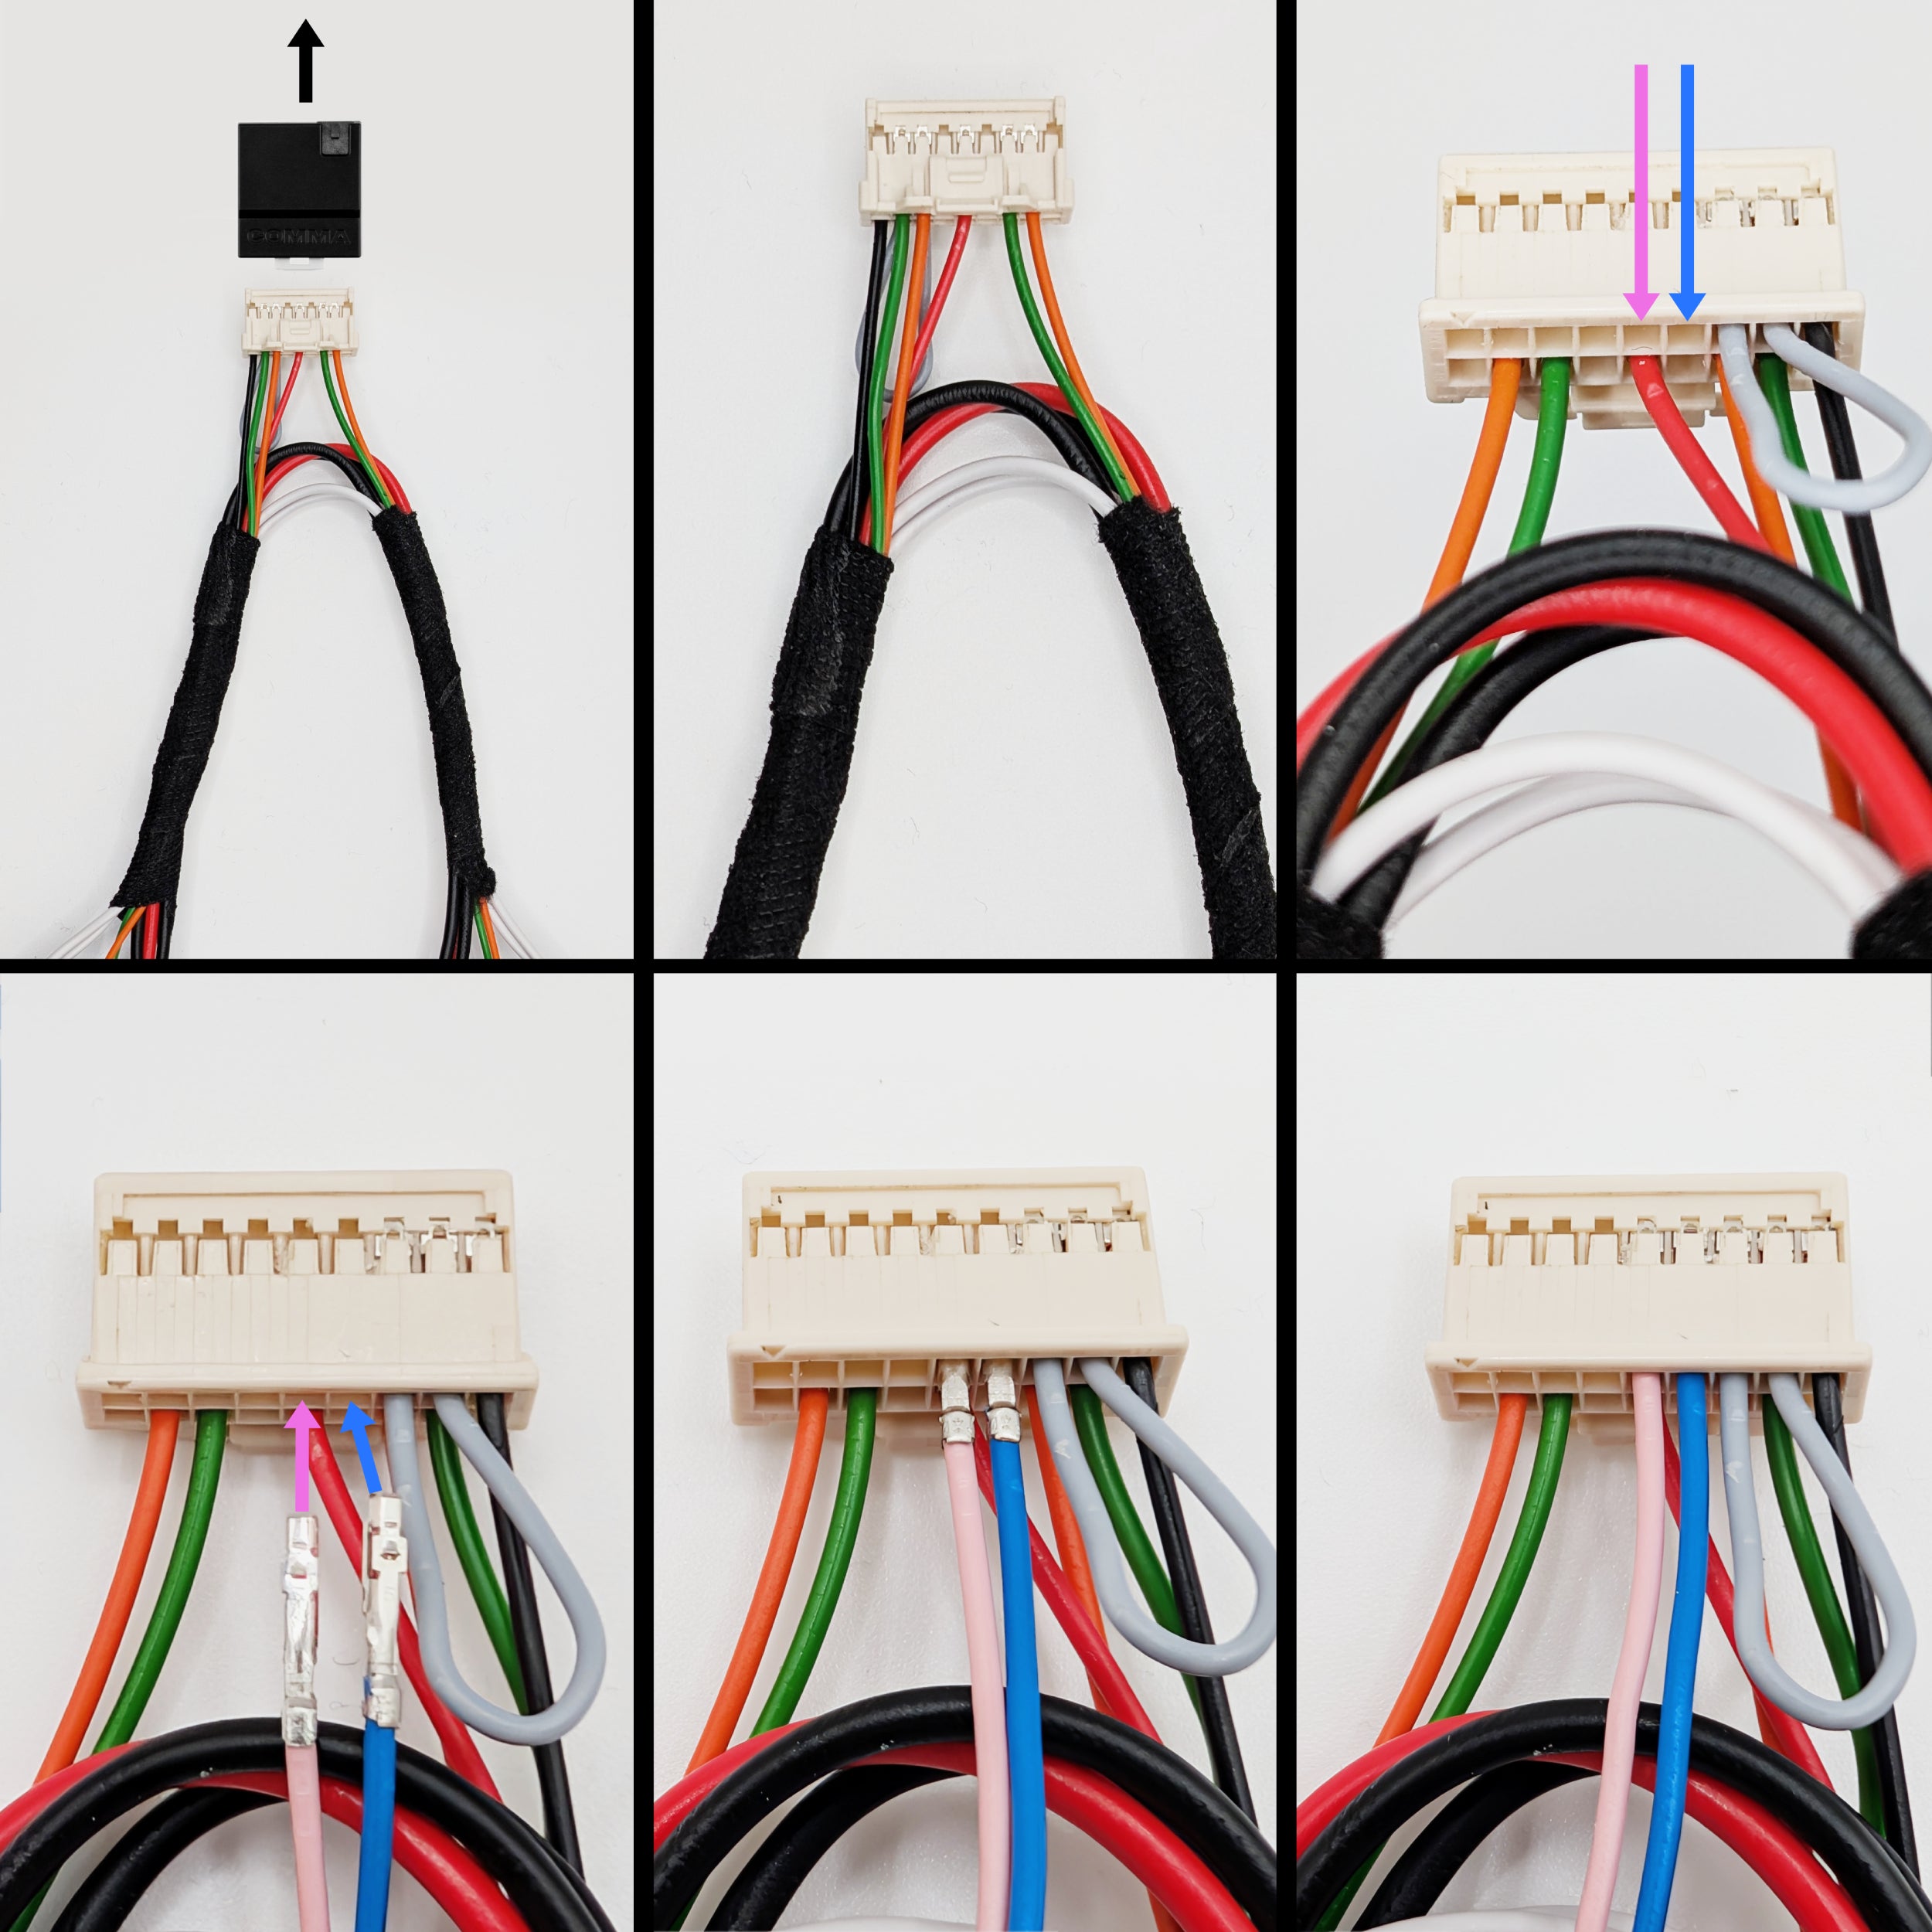
Where to insert the wires#
The two Molex Micro-Fit terminals are inserted into your existing comma harness connector:
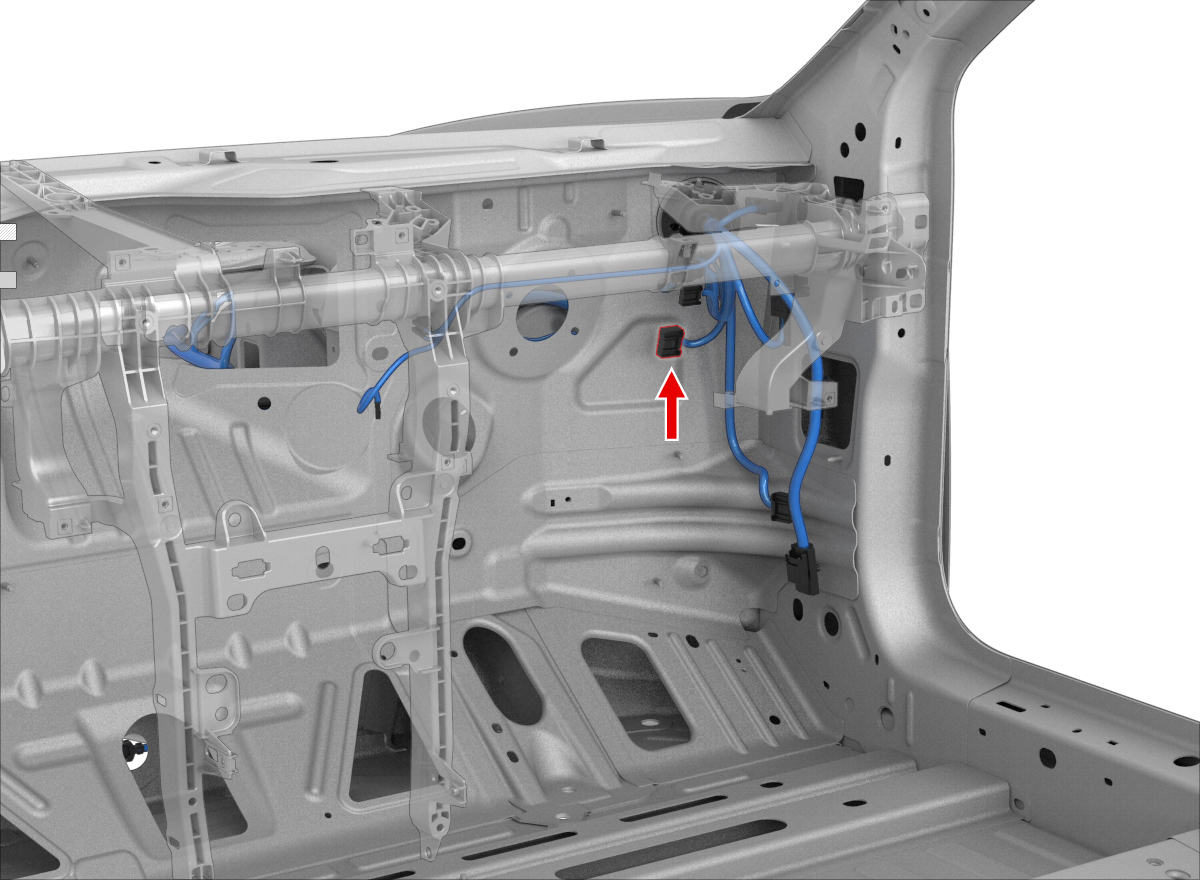
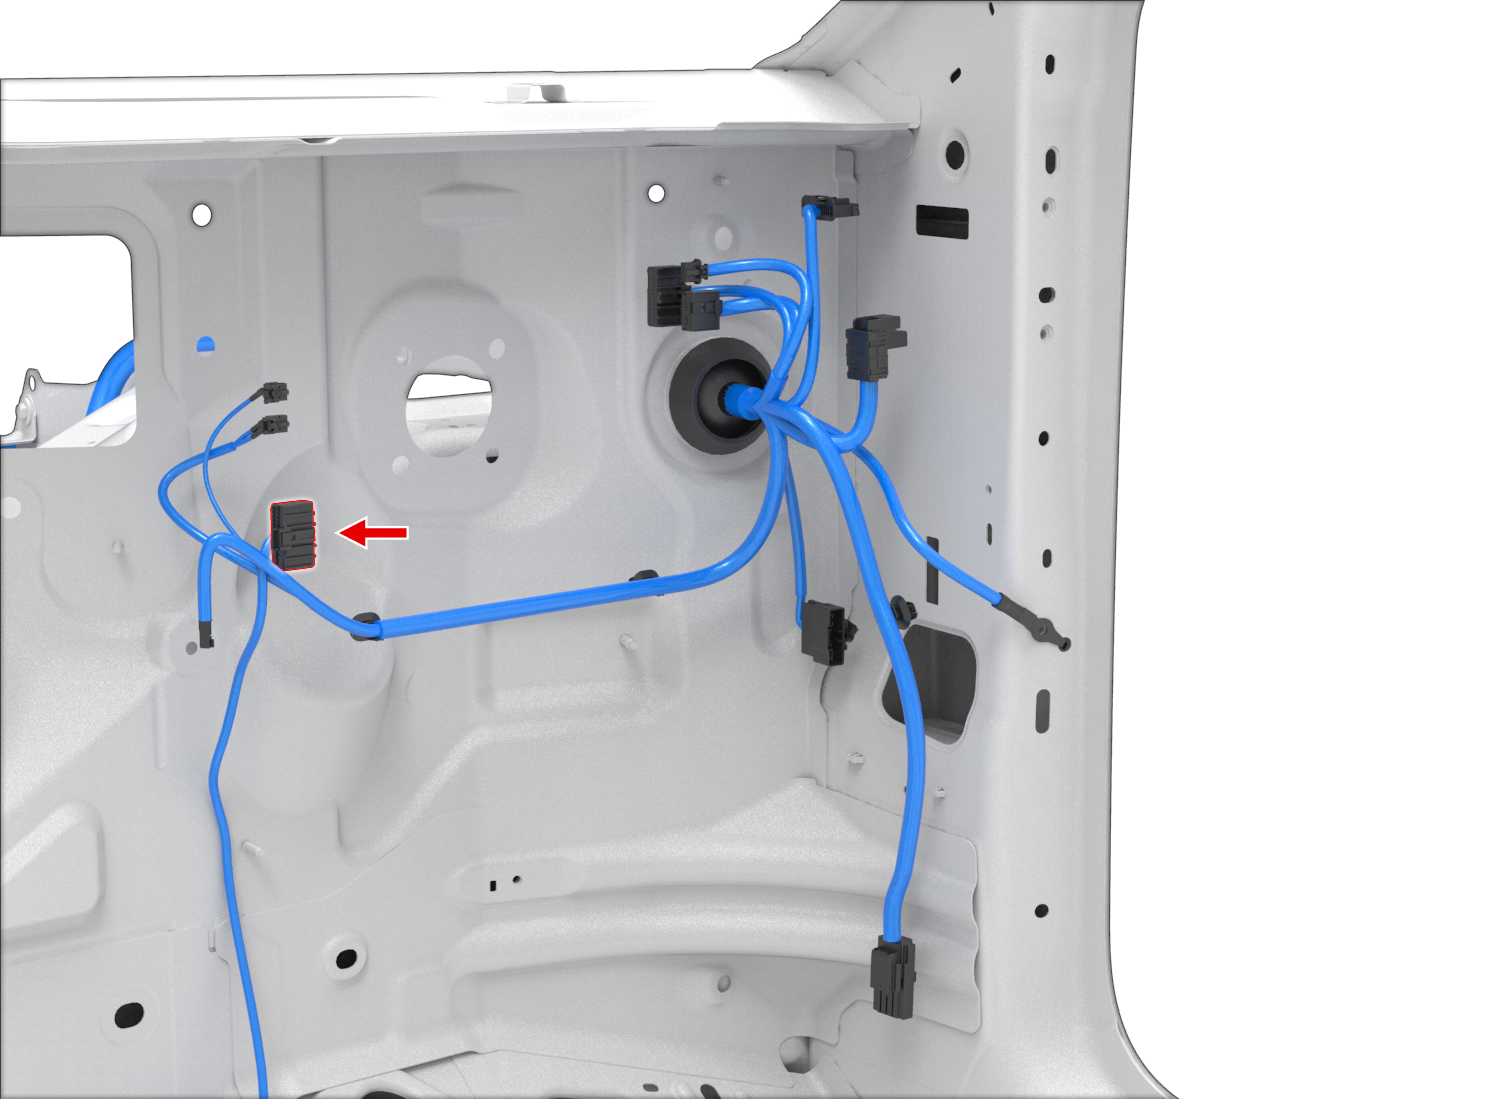
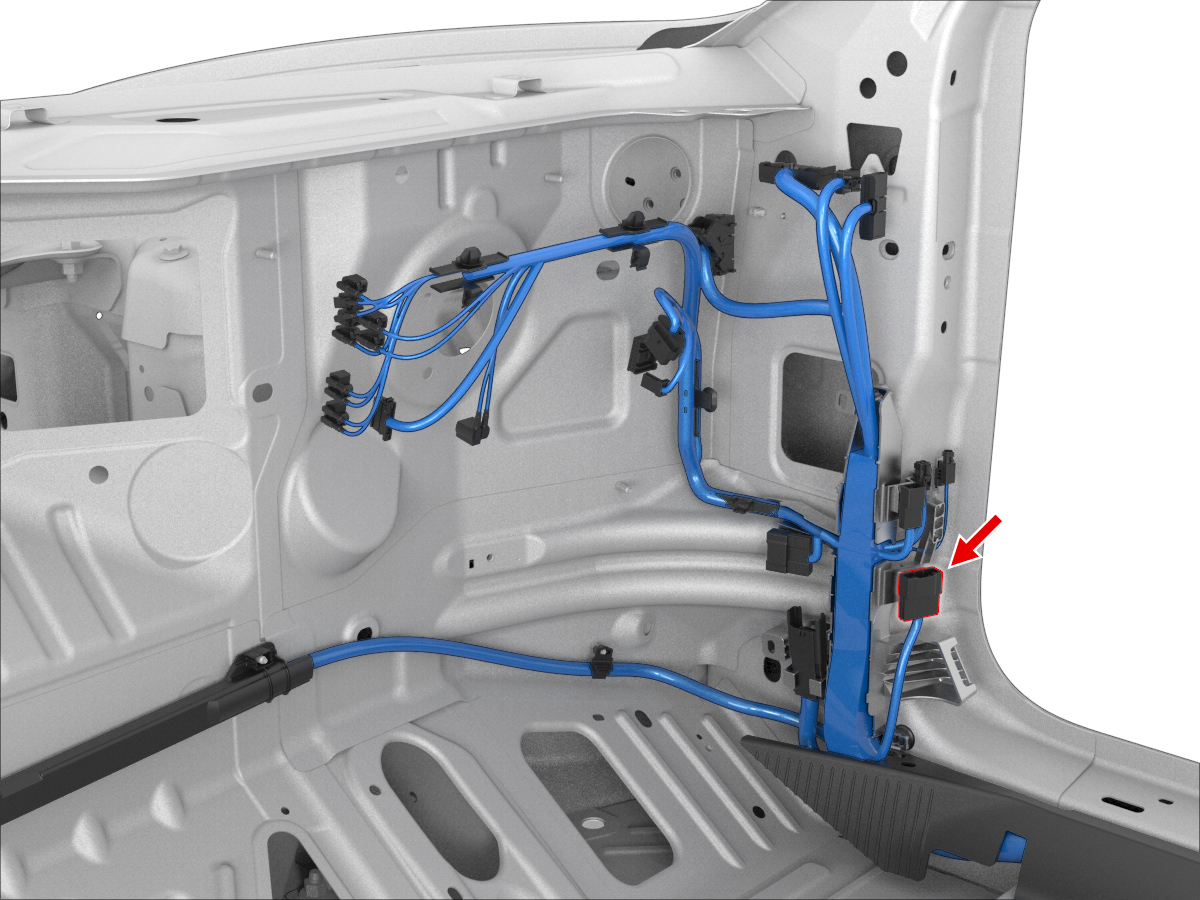
A-pillar connector location#
The Vehicle CAN bus connector is located on the right A-pillar (regardless of left- or right-hand drive). You access it by removing three plastic trim panels:
What does the Vehicle CAN bus enable?#
The Vehicle CAN bus is required for MADS (Modular Assistive Driving System) support in sunnypilot. MADS allows you to decouple steering and speed control — for example, keeping lane centering active while you manually control the throttle and brake. In stock openpilot, both lateral and longitudinal control always engage and disengage together.
On Tesla, sunnypilot’s MADS is engaged by tapping the infotainment screen with three fingers simultaneously. This gesture generates a CAN message that is only present on the Vehicle bus, which is why the addon cable is needed.