preAP Tesla Model S (no Autopilot)#
preAP Teslas only support the comma 3X and comma three, running the tesla-unity branch (based on openpilot 0.9.6). The comma four is not supported for preAP vehicles.
Quick Start#
- Get the Tesla Model S (preAP) - OBD-C Adapter / Harness. Check your OBD2 port for the correct pins.
- Get a comma 3X (or comma three) and mount it on your windshield
- Plug your comma device into the preAP OBD-C Adapter using the USB-C cable that came with your device
- Install the xnor fork of openpilot (use the tesla-unity branch)
- Patch your EPAS — required once before openpilot can control steering
- Edit the Tesla specific configuration settings
- Take your Tesla for a test drive with openpilot!
Supported Devices#
- comma 3X — recommended
- comma three — supported
The comma four is not supported for preAP Teslas.
See Installing openpilot for the correct installation URL. For details on comma hardware, see the comma hardware repository.
What You Get#
Out of the box, openpilot on a preAP Model S gives you:
- Lane Keep Assist (LKA) — steering to keep you centered in your lane
- Lane Departure Warning (LDW) — alerts when you drift out of your lane
- Adaptive Cruise Control (ACC) — vision-based, using regenerative braking only, works above 18 MPH
Optional Upgrades#
Each upgrade below builds on the base setup. They can be combined for the full experience.
| Upgrade | What it adds |
|---|---|
| Comma Pedal | Extends ACC down to 1 MPH (regen braking works above 5 MPH). Smoother speed control than stock cruise. |
| Tesla Bosch Radar Retrofit | More accurate lead car detection for better ACC. |
| iBooster | Replaces the vacuum brake booster with an electromechanical one. Enables full stop-and-go and automatic emergency braking (AEB). |
OBD-C Adapter / Harness#
The preAP OBD-C Adapter / Harness is the interface between your comma device and the car. It plugs into the OBD2 port in the driver footwell (under the ceiling of the footwell, towards the outside of the car, close to the door).
The adapter has the following ports:
| Port | Connects to | Notes |
|---|---|---|
| OBD2 connector | Car’s OBD2 port | Provides +12V, ground, and access to CAN buses |
| OBD-C port | Comma device (via USB-C cable) | Not a standard USB-C port — do not plug other devices into it |
| RJ45 port | Comma Pedal (via Ethernet cable) | CAN2. Not a standard Ethernet port — do not plug other devices into it |
| JST2.5 connector | Tesla Bosch Radar | CAN1, includes 120 ohm termination resistor |
Check your OBD2 port pins#
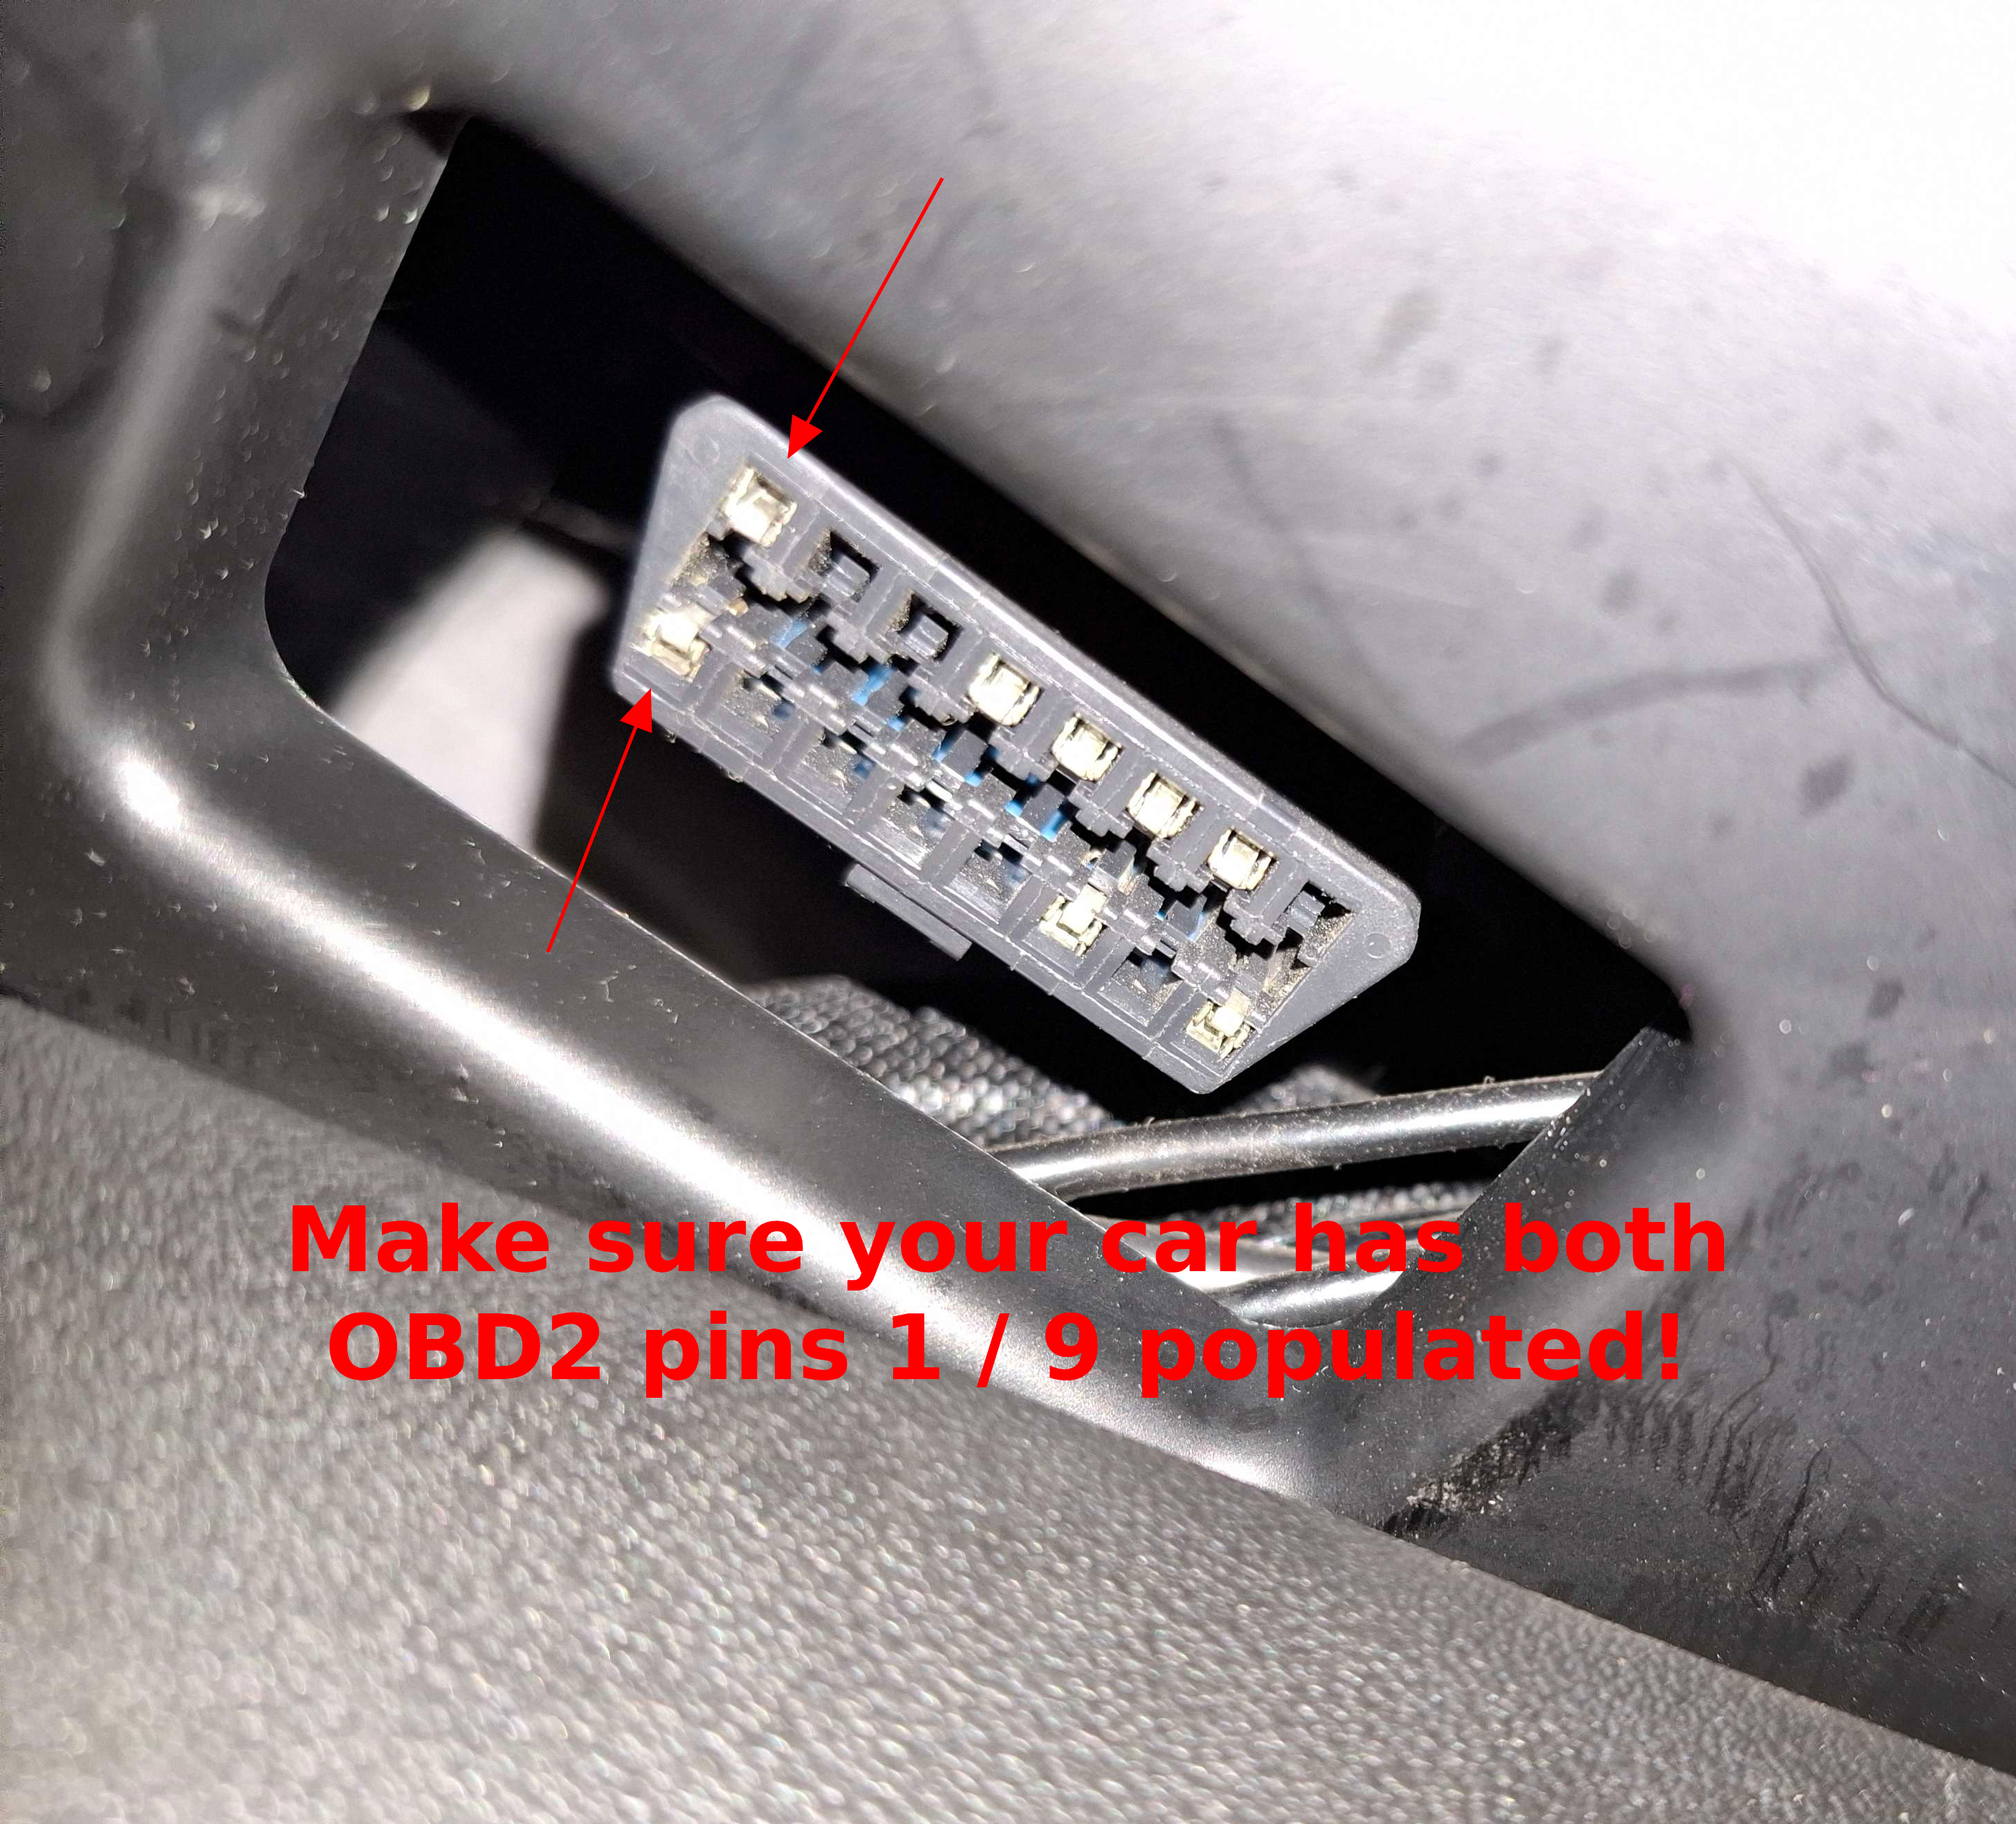
Depending on when your car was manufactured, your OBD2 port might or might not have pins 1 and 9 populated. These pins carry the Chassis CAN bus signal that the OBD-C Adapter needs.
- Pins 1 and 9 present: You’re ready to go — plug the OBD-C Adapter straight into the OBD2 port.
- Pins 1 and 9 missing: You need a Chassis CAN Retrofit Harness. This harness taps the Chassis CAN signal from the Tesla Diagnostic Port underneath the center console and populates pins 1 and 9 on your OBD2 connector. It’s a permanent, easy-to-install upgrade. If you’re also installing a comma pedal, do both at the same time since you’ll need to remove the footwell cover anyway.
If you need to connect more than one device to the OBD2 port, an OBD2 splitter can help.
Cable Routing#
To run the USB-C cable from the OBD2 port in the footwell up to the comma device on the windshield:
- Pull your cable from the footwell gap (where the OBD2 port with the preAP OBD-C Adapter is) up to the A-pillar.
- Remove the air bag cover from the A-pillar.
- Pull the cable up the A-pillar across to the mirror, holding it close to the headliner.
- Drape the cable end over the rear view mirror.
- Using a pry tool, lift the headliner corner and tuck the wire in along the top of the windshield. Route it down the front of the windshield to emerge at the bottom of the mirror base.
- Tuck the cable into the pillar cover and secure it to conceal the wiring.
Patch your EPAS#
The EPAS (Electric Power Assisted Steering) module on preAP Model S vehicles must be patched before openpilot can control the steering. This only needs to be done once.
Step-by-step#
- Put the car in Park, then tap Power Off on the touchscreen. Immediately touch the screen again — this wakes the MCU back up while the dash reads “Car Off”. The car’s electronics are on, but the drivetrain is off.
- Connect your comma device to the car via the preAP OBD-C Adapter. Let the device boot fully — wait until it shows “Connect Online” and “Vehicle Online”.
- Go to Settings > Tesla preAP > Flash EPAS. You will see a white screen with monospaced text and several buttons including “Patch”.
- Once you see the Patch button, shift the car into Neutral.
- Press and hold the brake pedal — keep it held down through the entire patching process.
- Wait 3–5 seconds, then tap Patch. Keep holding the brake.
- Wait for the patching process to complete.
- Once the patch succeeds, shift back into Park and release the brake pedal.
- Reboot the device and exit the car so it goes to “Car Off” mode. Your EPAS is now patched and ready.
If the patch fails#
- Do not release the brake pedal and do not reboot the device.
- Simply tap Patch again while still holding the brake — it often succeeds on the second attempt.
- If it continues to fail, make sure the car is in Neutral and the brake pedal is firmly pressed before trying again.